- Home
- keyboard_arrow_right Phelan Dental Seminars
- keyboard_arrow_right Transcription and Slides: Dental Excellence Video 2

Hi there. I’m Dr. Stephan Phelan. Welcome to Dental Excellence.
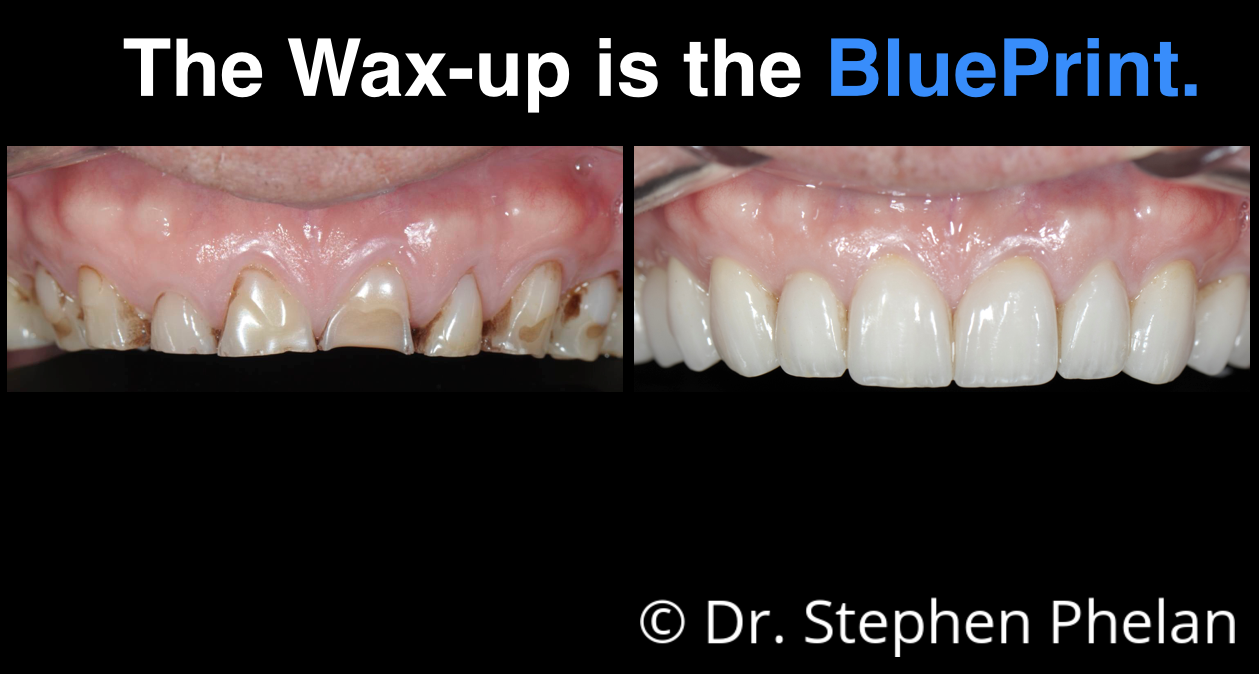
For this video I want to point out one of the themes that I follow when I’m teaching about more complex dental cases or aesthetic dental cases and that theme is the wax up is the blueprint. I really believe that you need to “begin with the end in mind”, to quote Steven Covey, if you’re going to be thinking about doing more complex dental or aesthetic cases.
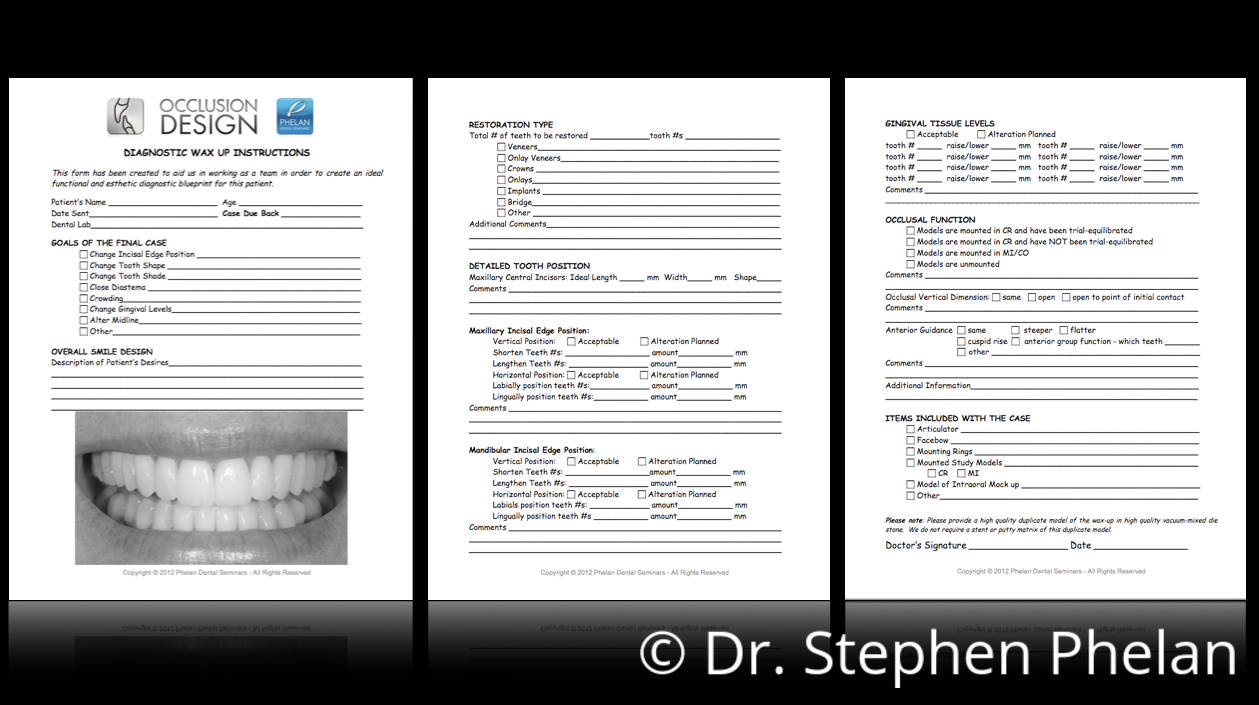
I designed my diagnostic wax up communication form to enable my ceramist to really have the vision that the patient and I have for the case. I did share this with a lot of people when I was promoting my occlusion design online course a couple of years ago and I think it was really well received. People really liked the concept and I wanted to add this to my Dental Excellence video series.
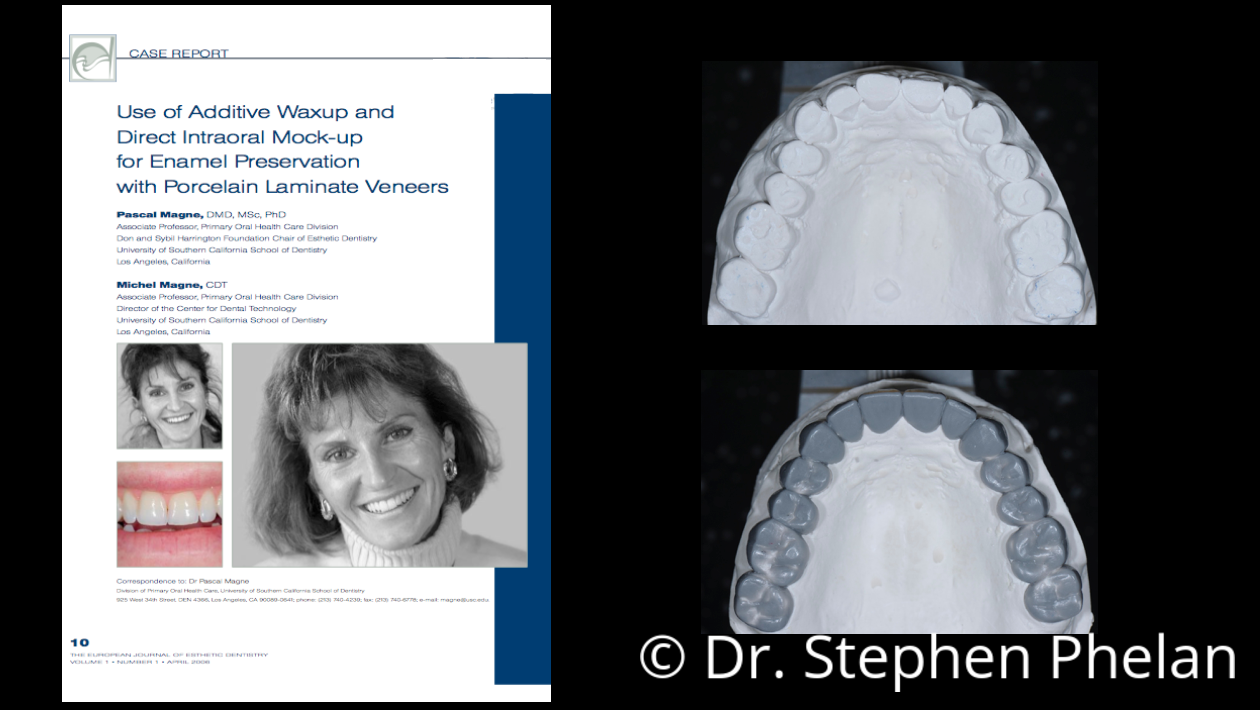
The concept of creating an additive diagnostic wax up, as well, is something that I first heard from Pascal Magne and Michel Magne when I went to the first course that they hosted at IDEA about ten years ago. It was a fantastic course; it really made me think about aesthetics at a really higher level just because of the level of beautiful dentistry that the Magne brothers produce.
And so, when I spoke to Harald, my ceramist, Harald Heindl, about the cases, we talked about additively contouring the porcelain restorations based on the wax up and the wax up additively contouring to the teeth so that we could, again, preserve more tooth structure and more of the patient’s own enamel. Even with crown cases, I like to preserve as much tooth structure as possible and as much enamel as possible so that if something were to break, I’d rather the porcelain, veneering porcelain, break than the tooth break at the gum line. So we try to preserve as much tooth structure as possible. So if you can, within the confines of the patient’s overall smile design, if you can create an additive contour wax up, that allows you to preserve more tooth structure.
So additive contour wax up is a really great concept. I would Google Dr. Pascal Magne and read some of his articles about this that he’s written with his brother, Michel Magne and this is a case that we did next to the case report from the Magne brothers.
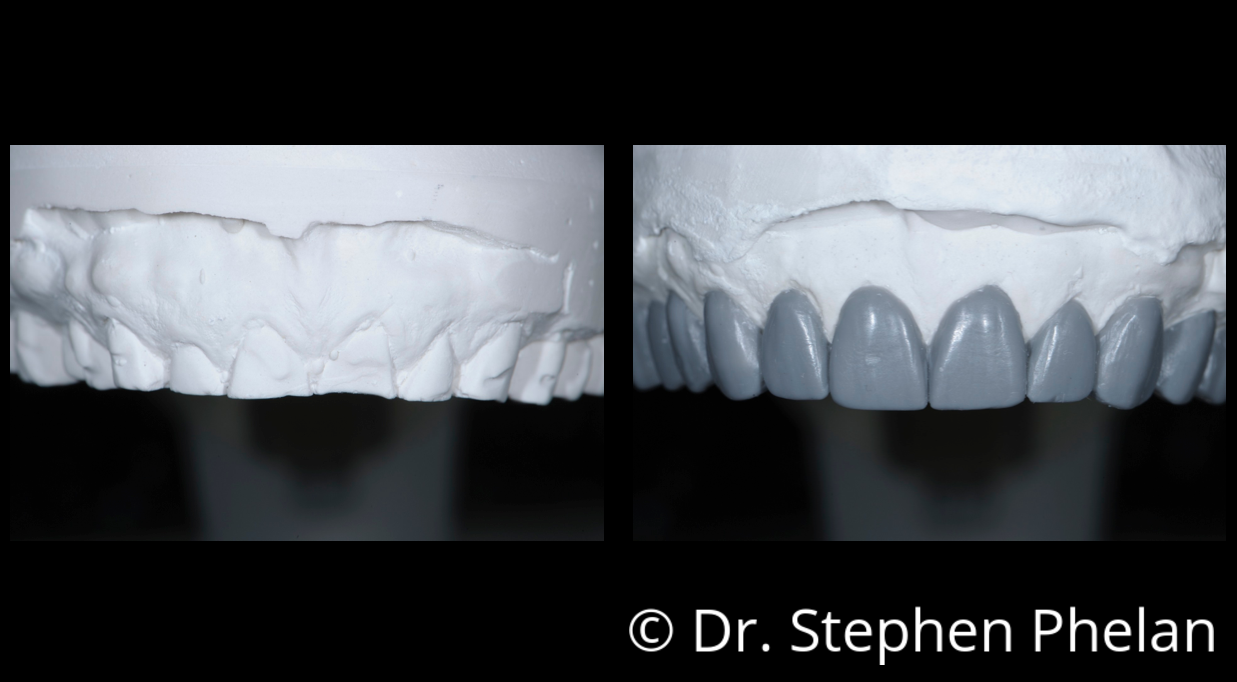
And I’ll just share with you this case briefly. It’s a patient that came into my practice with a lot of erosion, attrition and tooth wear. The result is the teeth are already somewhat prepared because of the amount of erosion and attrition on the teeth. There is no need for me to excessively prepare these teeth, there’s no reason to. We need to additively build up the tooth structure.
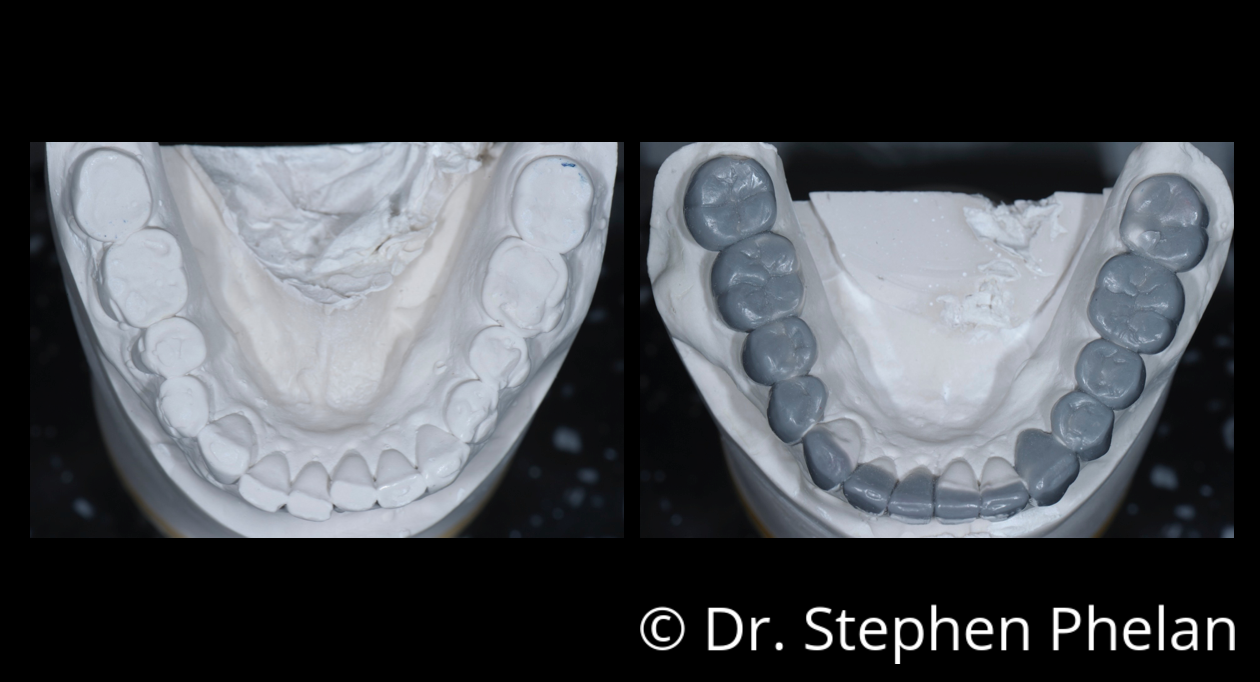
And you can see the before model next to the diagnostic wax up and appreciate the amount of volume of tooth structure we’re adding with this wax up. We then use that as the blueprint to make the provisional restorations, which are then the blueprint to create the porcelain restorations. So the wax up is the key, it’s the foundation for creating these restorations.
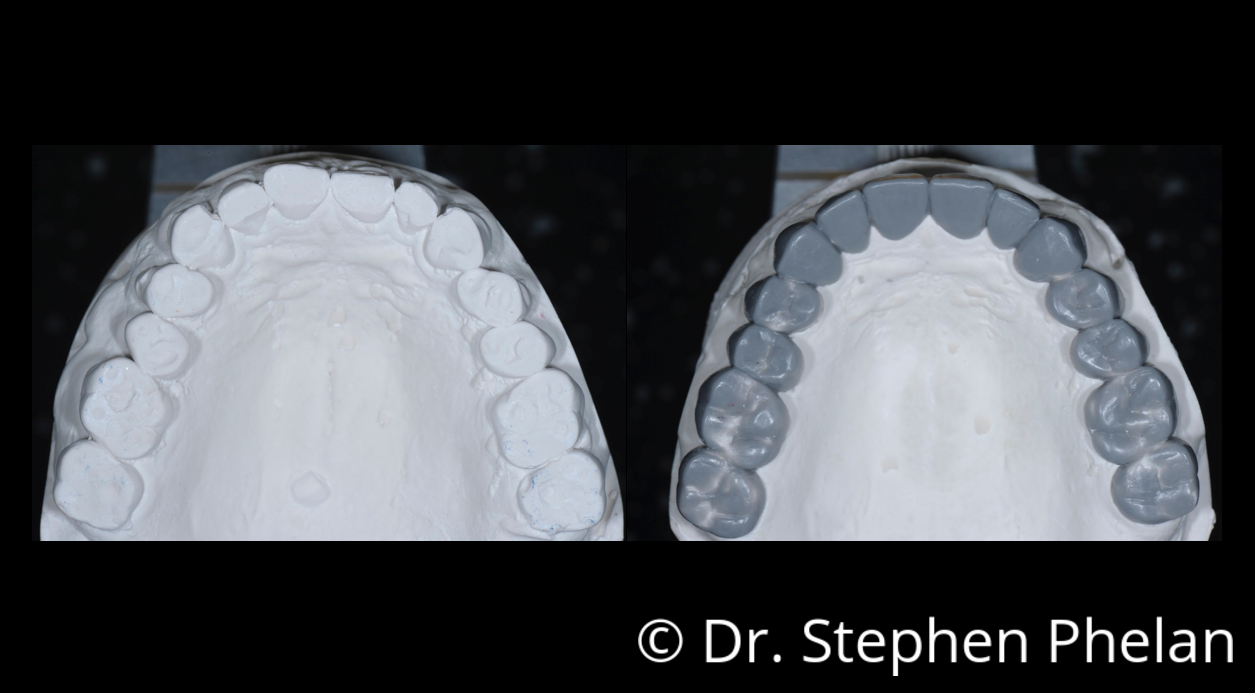
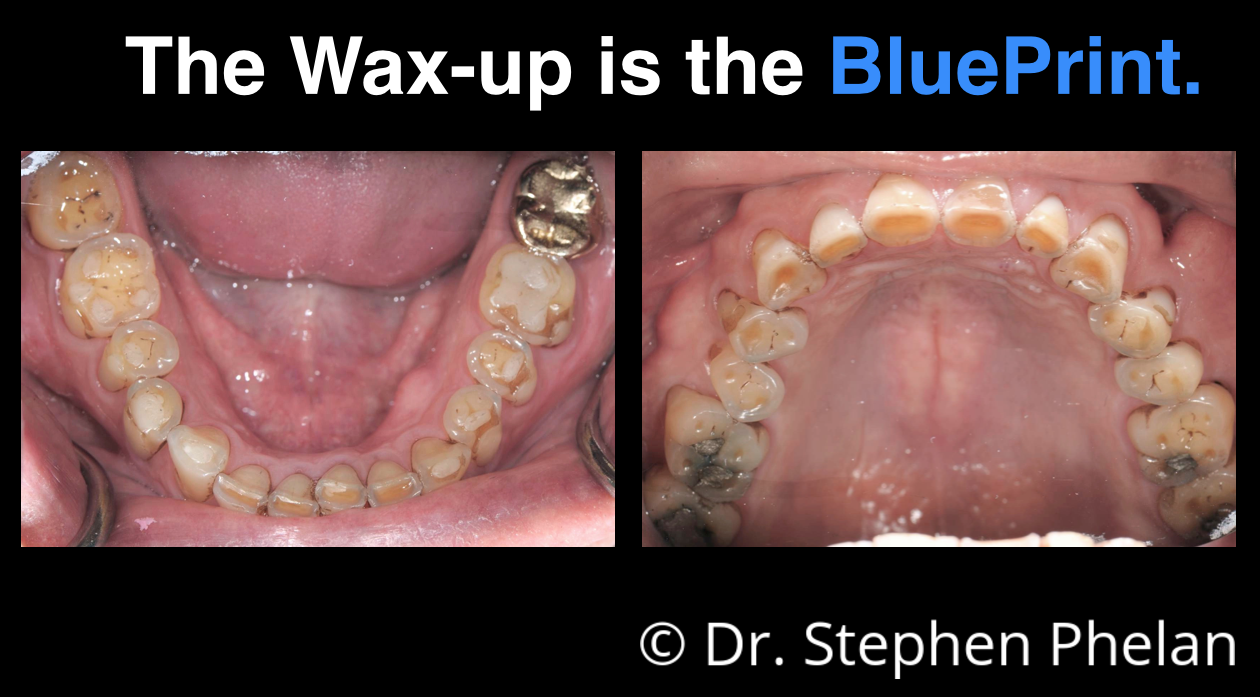
So here’s the patient again, occlusal view, you can see all the wax being added to the before model. It’s an additive wax up concept. And the wax up is the blueprint.
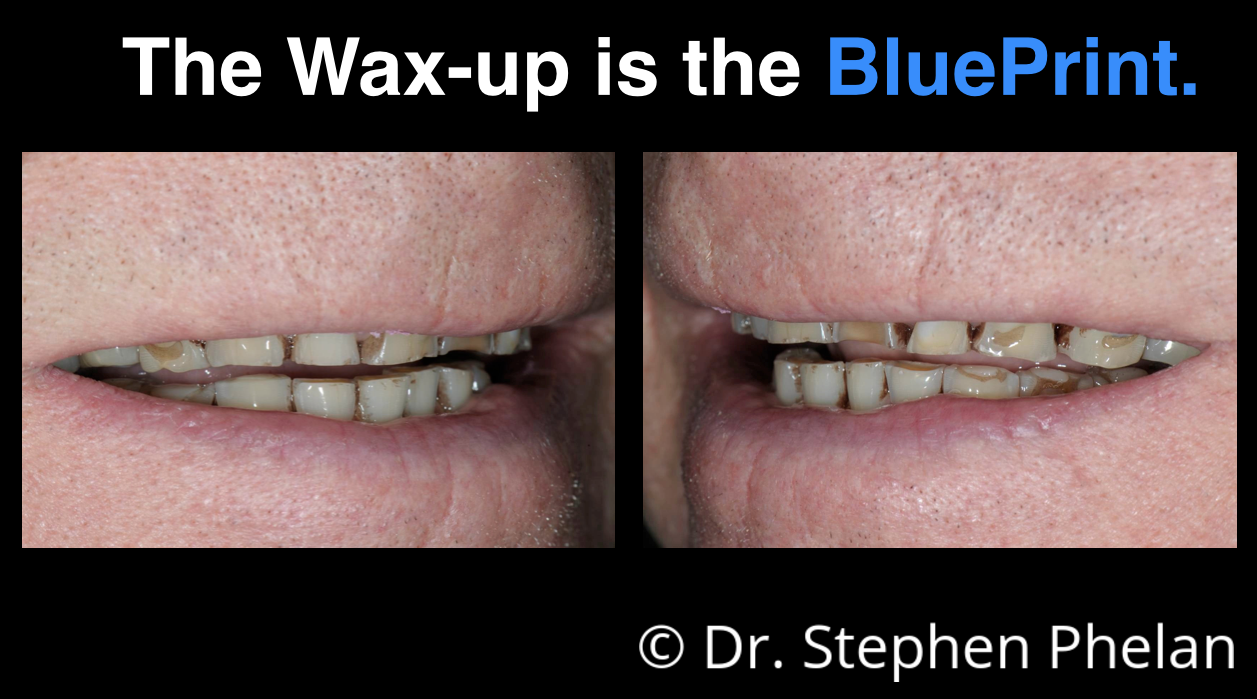
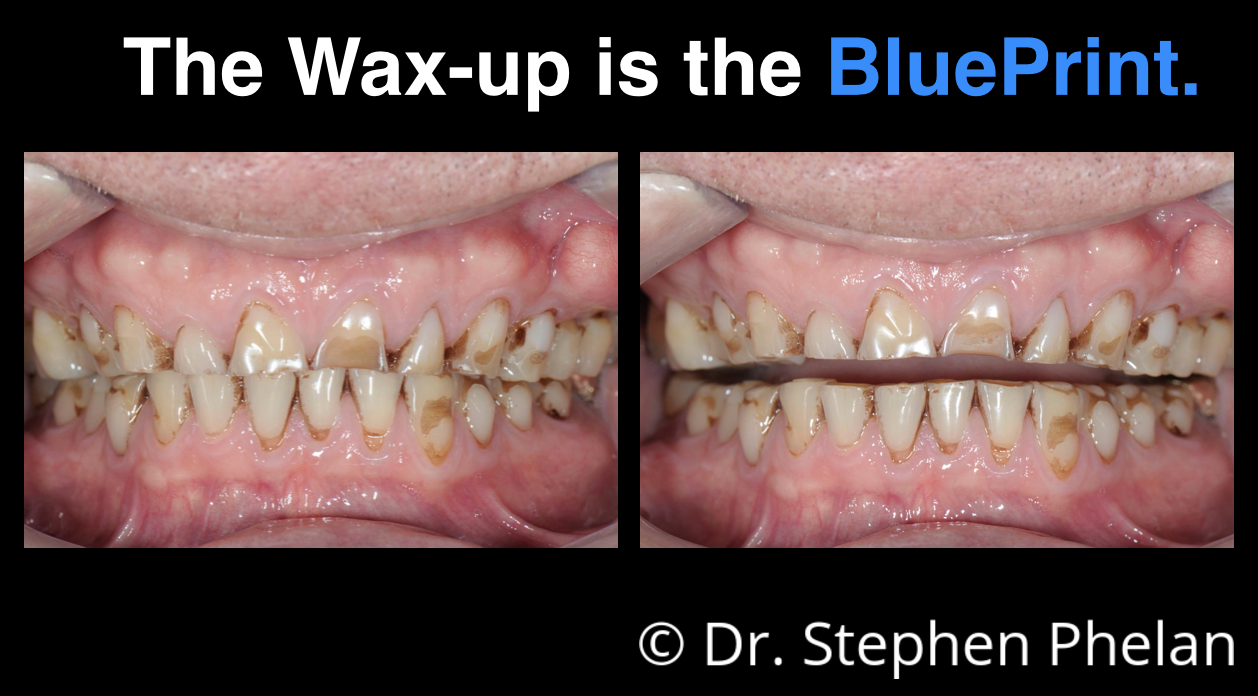
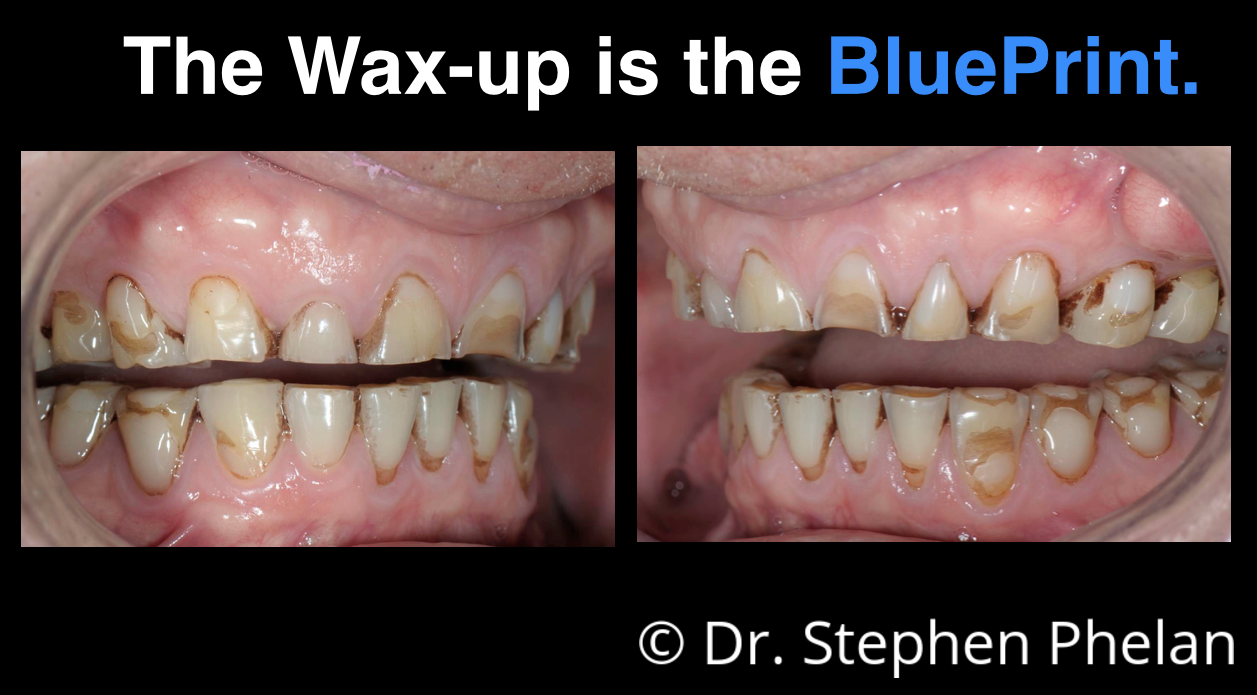
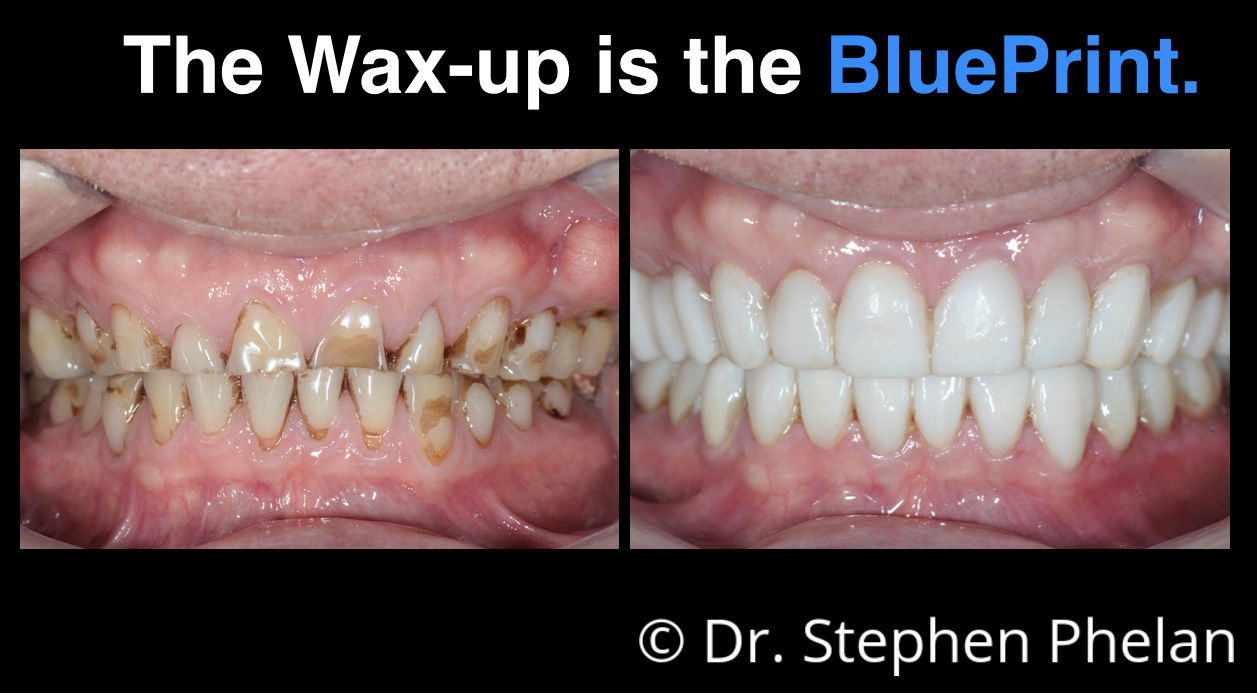
Here’s this particular patient and if you look at his before pictures, you know, we didn’t have to prepare the teeth a lot; the erosion and the attrition have prepared the teeth already. I had to prepare the teeth interproximally, so the jacket crowns would go over the teeth because I felt there was too much facial erosion to really prepare these teeth for porcelain veneers. But jacket crowns, conservatively prepared, are a good option for a patient like this with this much facial and incisal erosion.
So you look at the different views– here he is before. Again, end–to-end occlusion from the wear and the movement of the teeth as the teeth wore. He developed a more end-to-end occlusion as opposed to any kind of over jet and over bite. So we are going to open the vertical to create over jet and over bite so he has a more normal functioning occlusion and it helps with the survival of our restorations as opposed to having our restorations contact in an end-to-end occlusion.
There are a lot of good teaching points on this case and I will talk about this case in a few future Dental Excellence videos, but the bottom line for this video is the wax-up is the blueprint.
So you look at the before pictures. Looks like Bruxism, if you were to look at how the wear facets line up. The wax-up, again, was the blueprint to create the diagnostic provisional restorations.
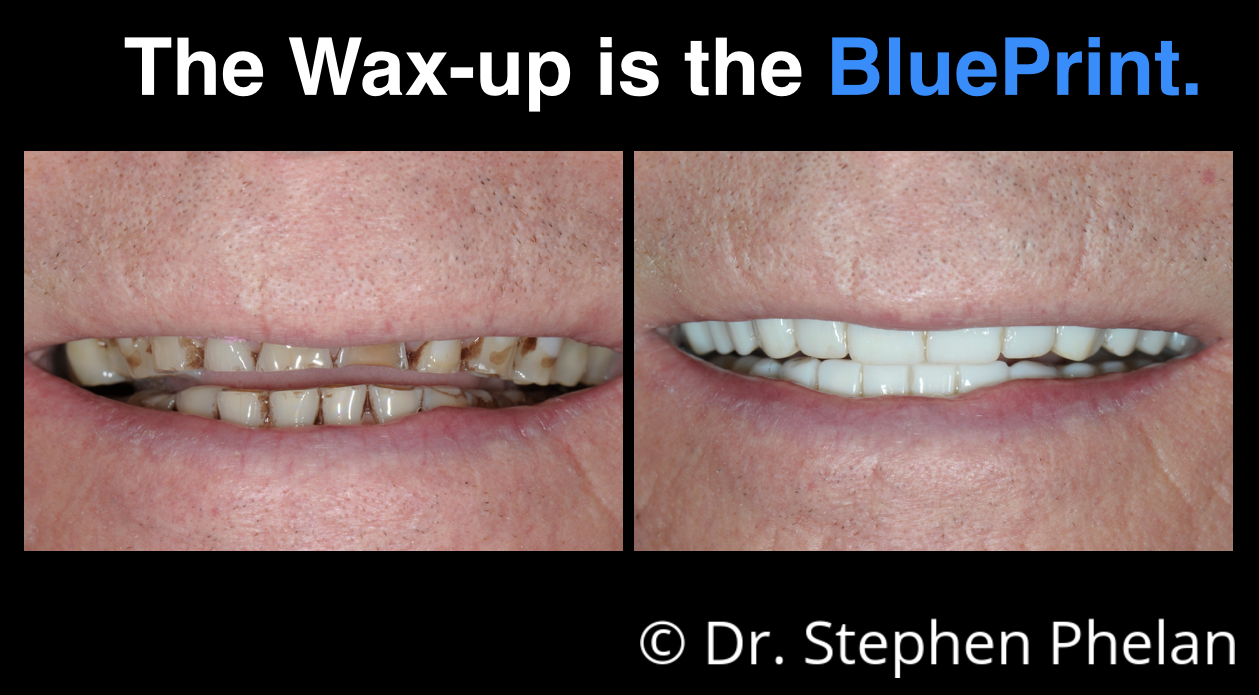
So if you look at the provisional restorations, we’ve changed the length of the teeth, the tooth volume and we’ve changed the occlusion design. We’ve opened the vertical, created some over jet and over bite and maintained a pretty flat occlusal guidance scheme. And so, look at the before and after change just by adding plastic– additively in the mouth, with the provisional restorations.
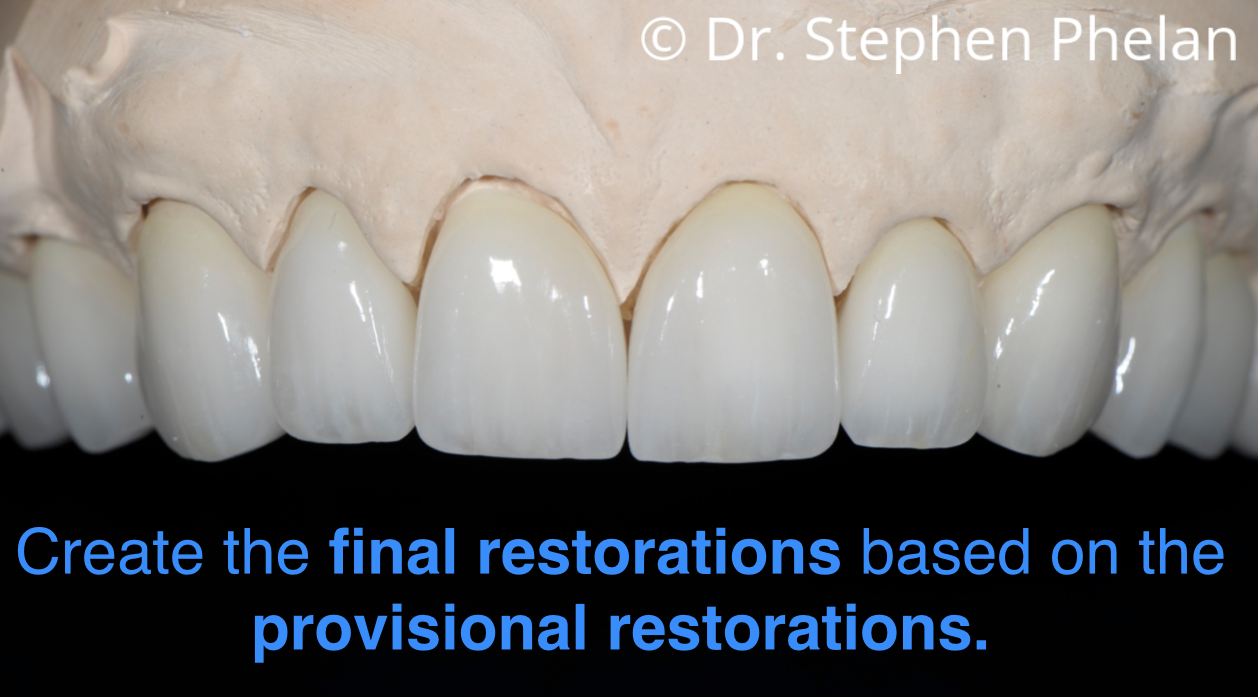
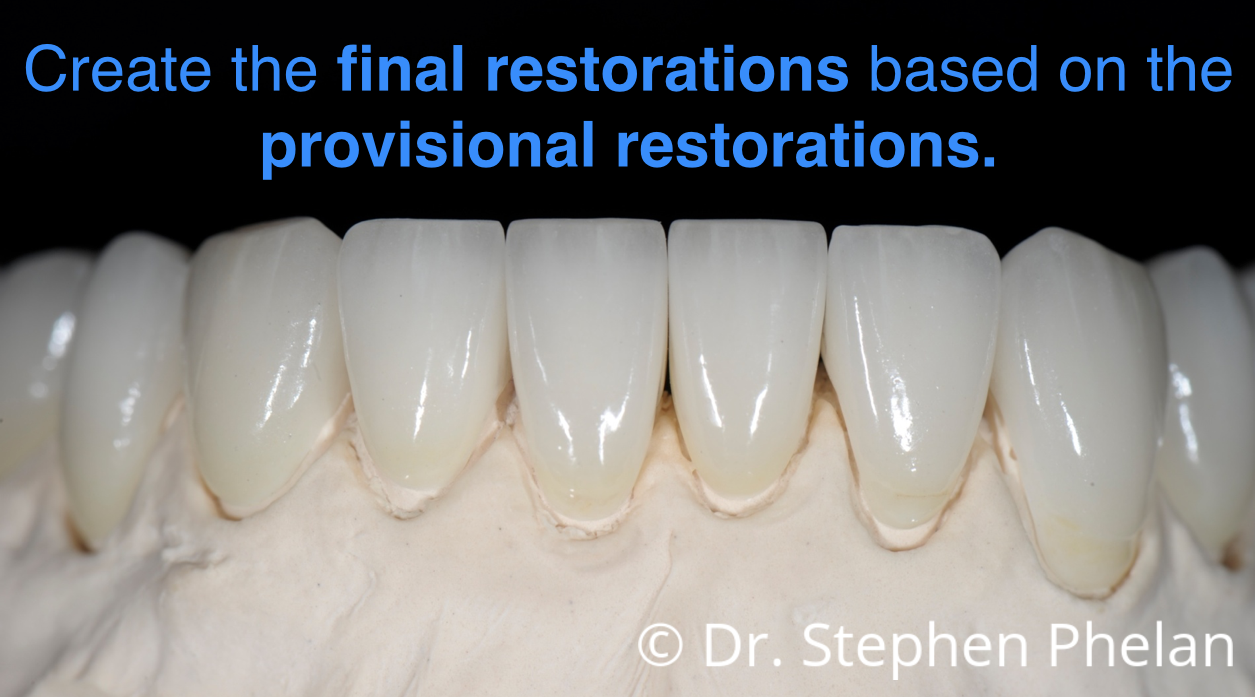
So here he is with his provisional restorations. What I said earlier is that we create the final restorations based on the provisional restorations. The provisional restorations were created based on the diagnostic wax-up. So we are, again, using the wax-up as the blueprint.
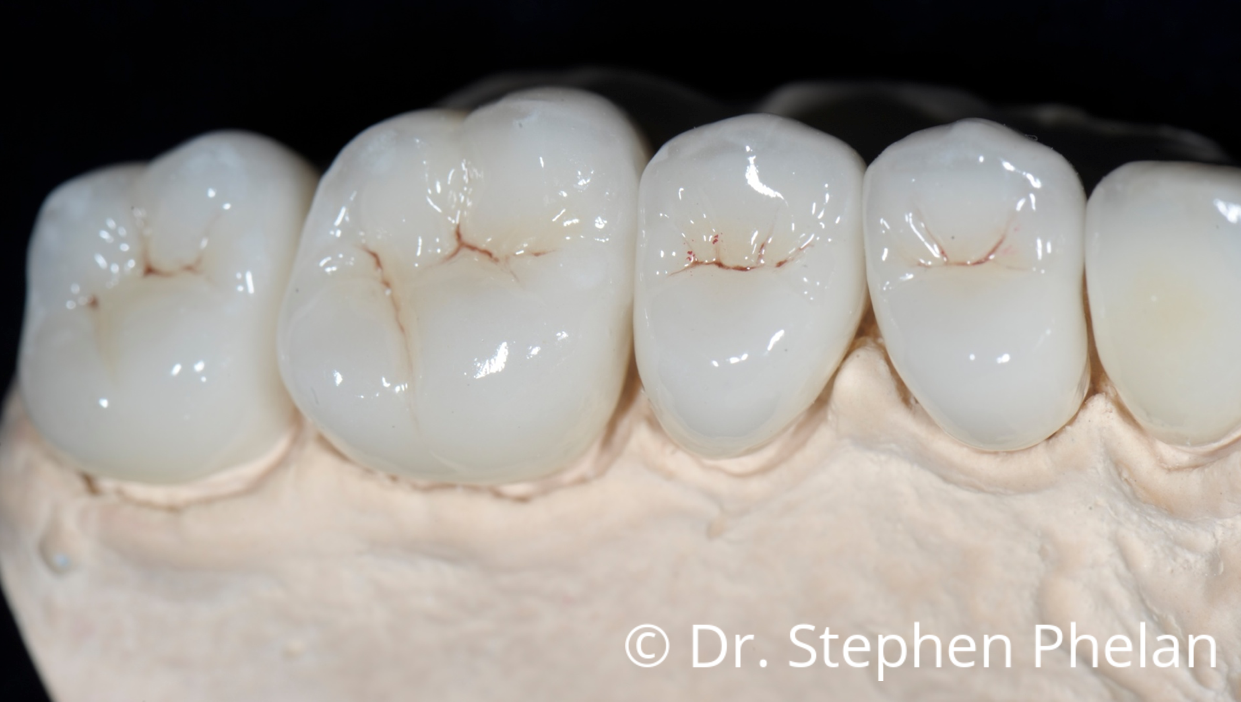
So here are the final restorations, these are Lava Zirconia crowns, layered Lava Zirconia crowns. You know, this case was completed about four years ago. My ceramist Harald Heindl from the Seattle area creates the restorations; he’s a German Master Dental Ceramist. Beautiful anatomy, beautiful layering of the porcelain but for me the keys are beautiful fit and beautiful occlusion– beautiful fit and occlusion. Those are the keys to make my life easier as well as the beauty and the aesthetics.
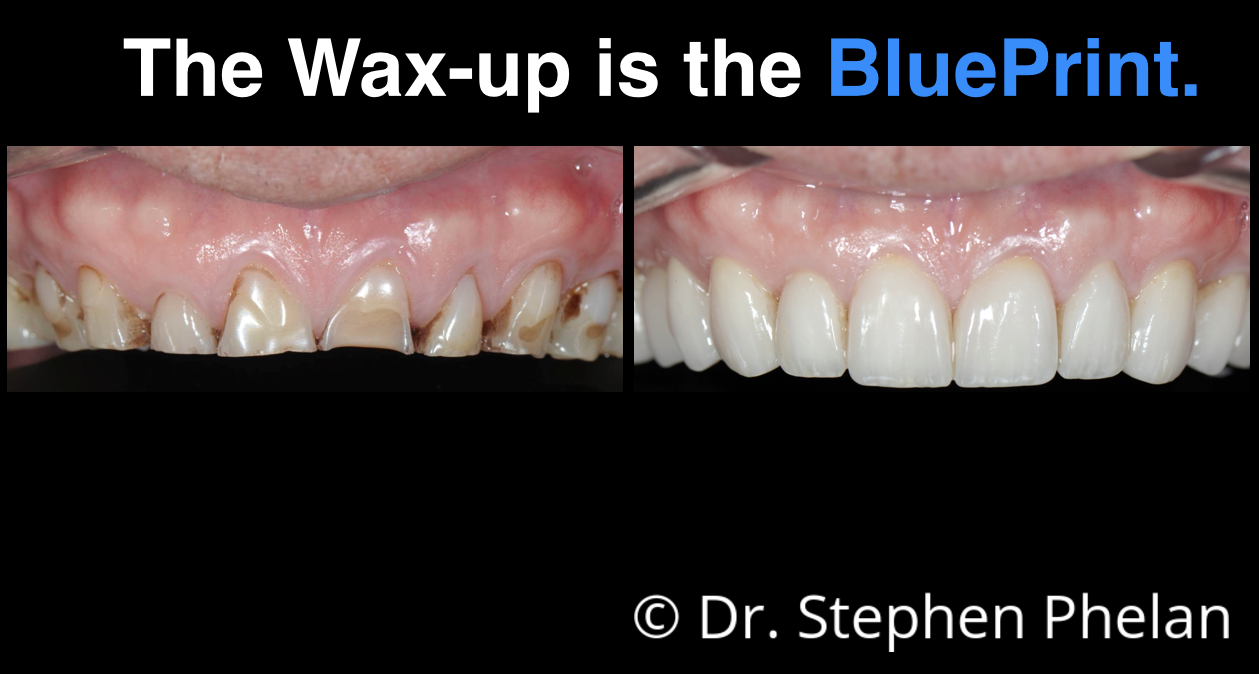
So there are the before and after photographs of the close-up view and, you know, it’s a huge change for this patient, it’s a transformational change, really. When you look at what this does to the overall appearance of the person it makes almost everybody who has a before and after change like this look tremendously younger. You can’t help it because you’ve changed the whole part of the face that people look at the second-most; they say that people look at the eyes the most and then secondly the teeth and smile. So, you know, this is transformational.
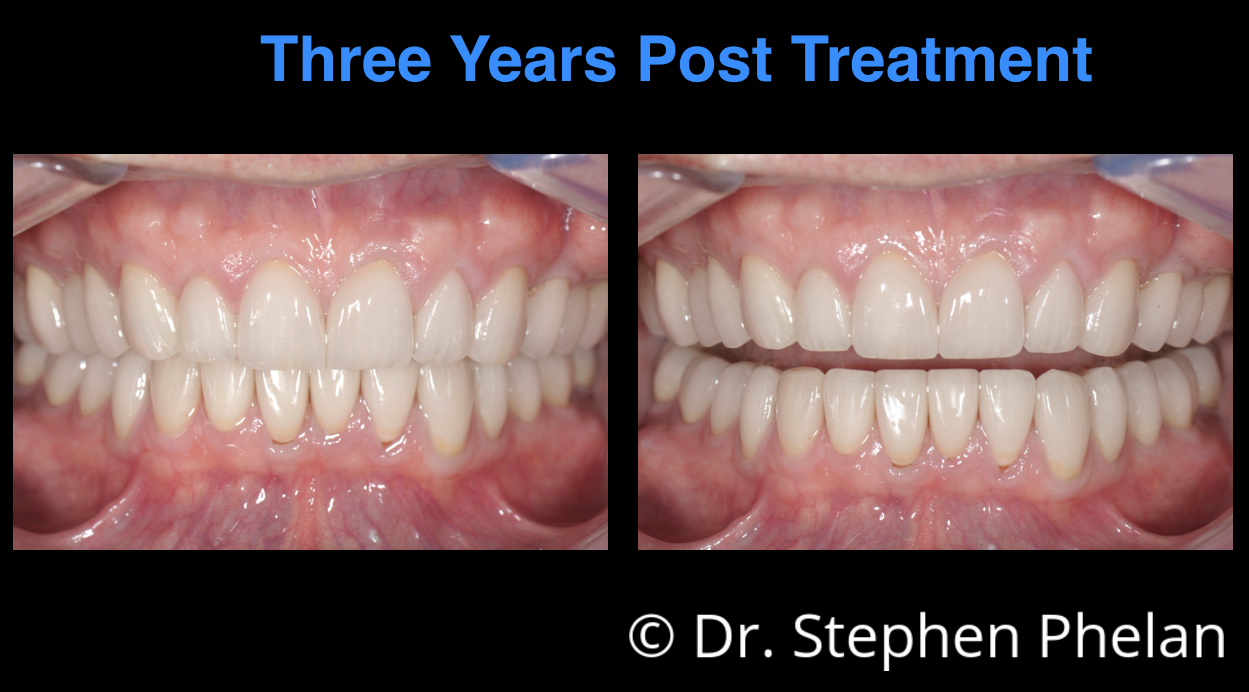
These photos were taken a while ago with the three-year post ops, you can see the case has held up exceptionally well but he did have very nice occlusal design, very precise and well thought-out occlusion design for this particular case. I talk about the occlusion design and the different things that we look at with over jet, over bite, angle of guidance, pathway of guidance as well as degree and width of guidance.
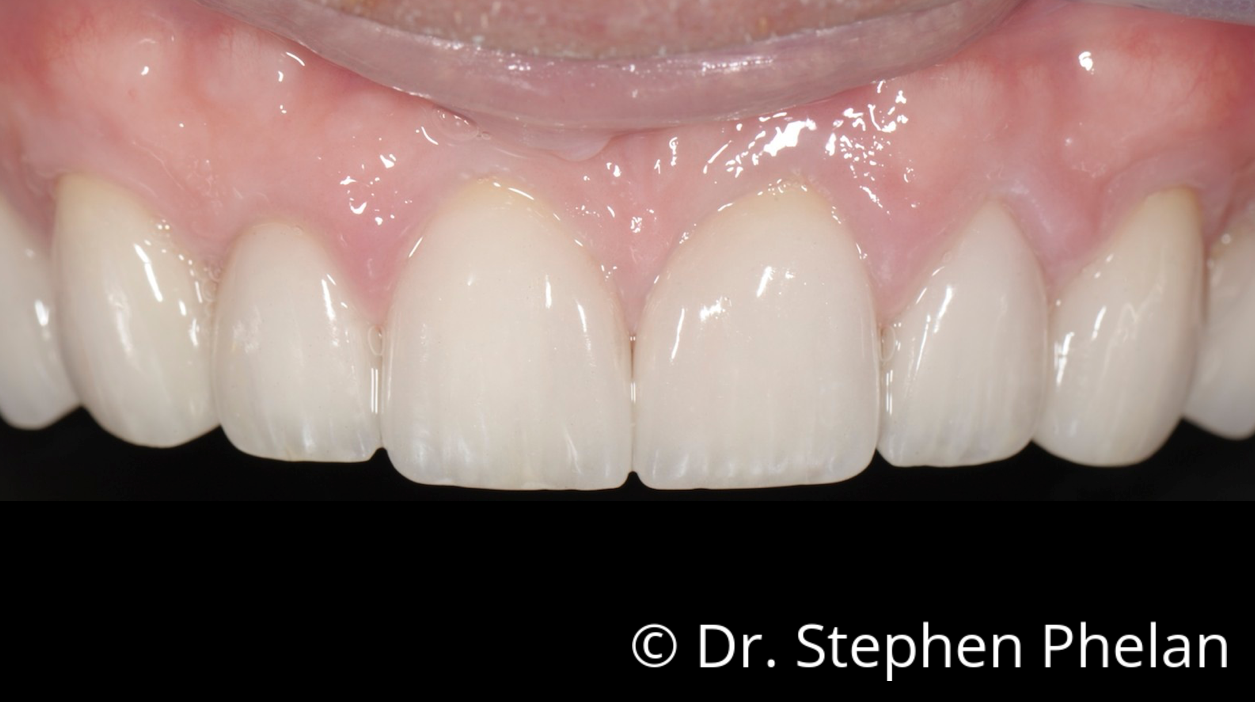
Here are some more views. Natural-looking aesthetics, these are Lava Zirconia restorations but layered in such a way that they can look very natural.
And I’ll just end by saying that you can do this kind of dentistry. I have an everyday practice, I just really document well and I work with a great ceramist so I’m fortunate that way, obviously.
You can do this kind of dentistry. Beautiful dentistry with precise fit and occlusion
Tagged as: Dr. Stephen Phelan, Phelan Dental Seminars, Dental Education, Dental Occlusion, Full Mouth Rehabilitation, Dental Implant, Dental Restorations, Macro Dental Photography, Photography, Porcelain Restorations, minimally invasive dental implant surgery, oakville dentist, Phelan, Occlusion Design, smile design.
© Copyright Phelan Dental Seminars I Dr. Stephen Phelan



Post comments (0)